Table Of Contents
Basic Picture Viewer(翻訳済み)
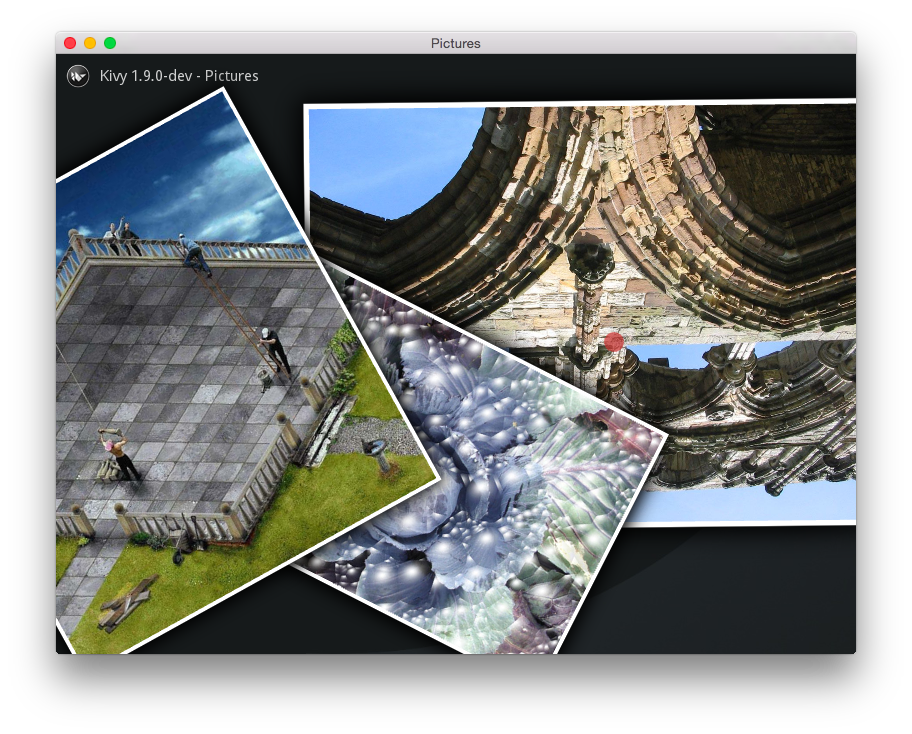
シンプルな画像ブラウザは、scatter ウィジェットのデモです。 背景に白縁がついた写真が表示されます。 周りの写真をドラッグやクリックで、マルチタッチや、赤い点をドロップして写真の拡大縮小や回転ができます。
kivyに同梱されたデータで、背景画像はkivy/data/images/background.jpgで、写真は、ローカルのimagesディレクトリからロードされます。pictures.kvファイルは、インタフェースについて説明し、shadow32.pngファイルは、画像がフレーム付き写真のように見えるようにするボーダーです。 最後に、android.txtファイルはKivyランチャーAndroidのアプリケーションで使用するためのアプリケーションをパッケージ化するために使用されます。
Androidデバイスでは、あなたのAndroidデバイス上で /sdcard/kivy/showcase の中に、このディレクトリをコピー/ペーストすることができます
image directory の画像はインターネットアーカイブ`https://archive.org/details/PublicDomainImages` から取得しており、ライセンスはパブリックドメインです。
File demo\pictures\main.py
'''
Basic Picture Viewer
====================

This simple image browser demonstrates the scatter widget. You should
see three framed photographs on a background. You can click and drag
the photos around, or multi-touch to drop a red dot to scale and rotate the
photos.

The photos are loaded from the local images directory, while the background
picture is from the data shipped with kivy in kivy/data/images/background.jpg.
The file pictures.kv describes the interface and the file shadow32.png is
the border to make the images look like framed photographs. Finally,
the file android.txt is used to package the application for use with the
Kivy Launcher Android application.

For Android devices, you can copy/paste this directory into
/sdcard/kivy/pictures on your Android device.

The images in the image directory are from the Internet Archive,
`https://archive.org/details/PublicDomainImages`, and are in the public
domain.

'''

import kivy
kivy.require('1.0.6')

from glob import glob
from random import randint
from os.path import join, dirname
from kivy.app import App
from kivy.logger import Logger
from kivy.uix.scatter import Scatter
from kivy.properties import StringProperty


class Picture(Scatter):
    '''Picture is the class that will show the image with a white border and a
    shadow. They are nothing here because almost everything is inside the
    picture.kv. Check the rule named <Picture> inside the file, and you'll see
    how the Picture() is really constructed and used.

    The source property will be the filename to show.
    '''

    source = StringProperty(None)


class PicturesApp(App):

    def build(self):

        # the root is created in pictures.kv
        root = self.root

        # get any files into images directory
        curdir = dirname(__file__)
        for filename in glob(join(curdir, 'images', '*')):
            try:
                # load the image
                picture = Picture(source=filename, rotation=randint(-30, 30))
                # add to the main field
                root.add_widget(picture)
            except Exception as e:
                Logger.exception('Pictures: Unable to load <%s>' % filename)

    def on_pause(self):
        return True


if __name__ == '__main__':
    PicturesApp().run()
File demo\pictures\pictures.kv
1 2 3 4 5 6 7 8 9 10 11 12 13 14 15 16 17 18 19 20 21 22 23 24 25 26 27 28 29 30 31 32 33 34 35 36 37 38 39 40 41 42 43 44 45 46 47 48 49 50 51 52 53 54 | #:kivy 1.0
#:import kivy kivy
#:import win kivy.core.window
FloatLayout:
canvas:
Color:
rgb: 1, 1, 1
Rectangle:
source: 'data/images/background.jpg'
size: self.size
BoxLayout:
padding: 10
spacing: 10
size_hint: 1, None
pos_hint: {'top': 1}
height: 44
Image:
size_hint: None, None
size: 24, 24
source: 'data/logo/kivy-icon-24.png'
Label:
height: 24
text_size: self.width, None
color: (1, 1, 1, .8)
text: 'Kivy %s - Pictures' % kivy.__version__
<Picture>:
# each time a picture is created, the image can delay the loading
# as soon as the image is loaded, ensure that the center is changed
# to the center of the screen.
on_size: self.center = win.Window.center
size: image.size
size_hint: None, None
Image:
id: image
source: root.source
# create initial image to be 400 pixels width
size: 400, 400 / self.image_ratio
# add shadow background
canvas.before:
Color:
rgba: 1,1,1,1
BorderImage:
source: 'shadow32.png'
border: (36,36,36,36)
size:(self.width+72, self.height+72)
pos: (-36,-36)
|
Image demo\pictures\shadow32.png

File demo\pictures\android.txt
1 2 3 | title=Pictures
author=Kivy team
orientation=landscape
|

